
Getting started
There is no account, no sign-up and no password. Install the app, open it, and everything works straight away, even without a connection.
Installing
Christian Walk is an Android app. On your phone, download the .apk file (version 2.5.0, about 93 MB) from this site and open it. If Android asks, allow your browser to install apps. There is no iPhone version yet.
The first screen
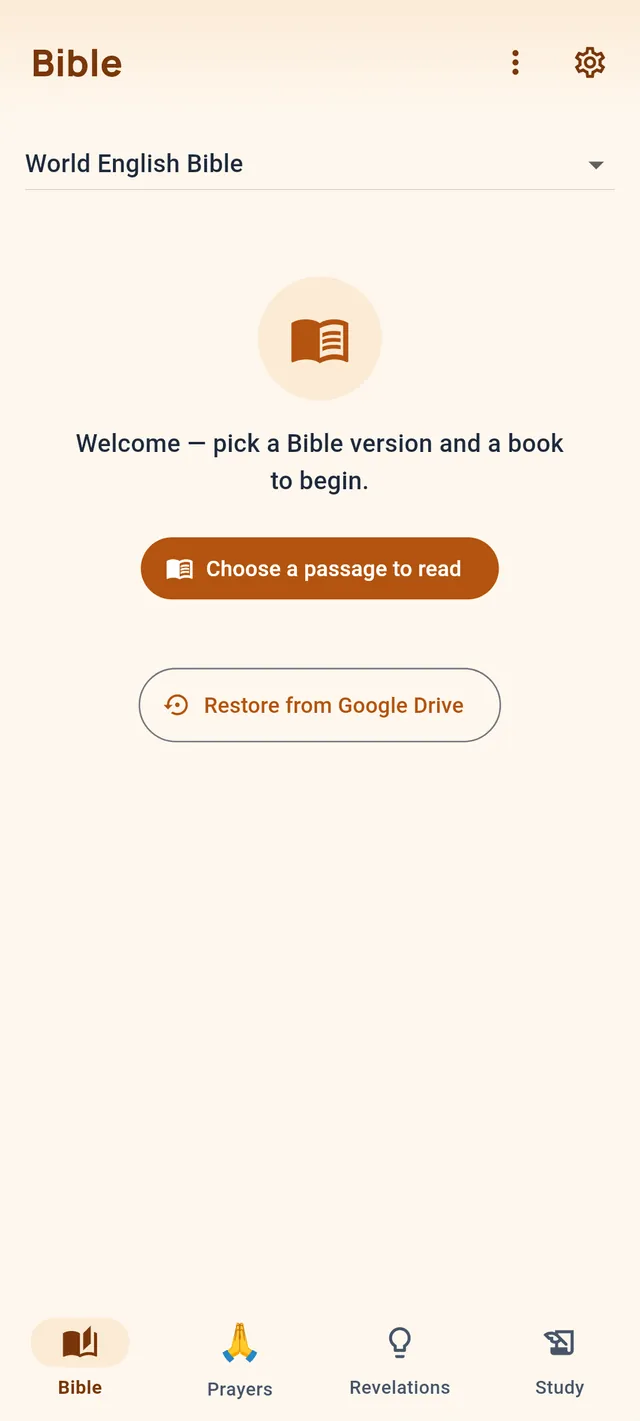
The app opens on the Bible tab. Tap Choose a passage to read to start. If you used Christian Walk with Google Drive backup on another phone, tap Restore from Google Drive on this first screen to bring your journal back (see Backup).
Finding your way around
The bar at the bottom has four tabs. Each one has its own colour, which follows you into its lists, readers and editors.
| Tab | What it holds |
|---|---|
| Bible | The reader, your place in it, and your highlights. |
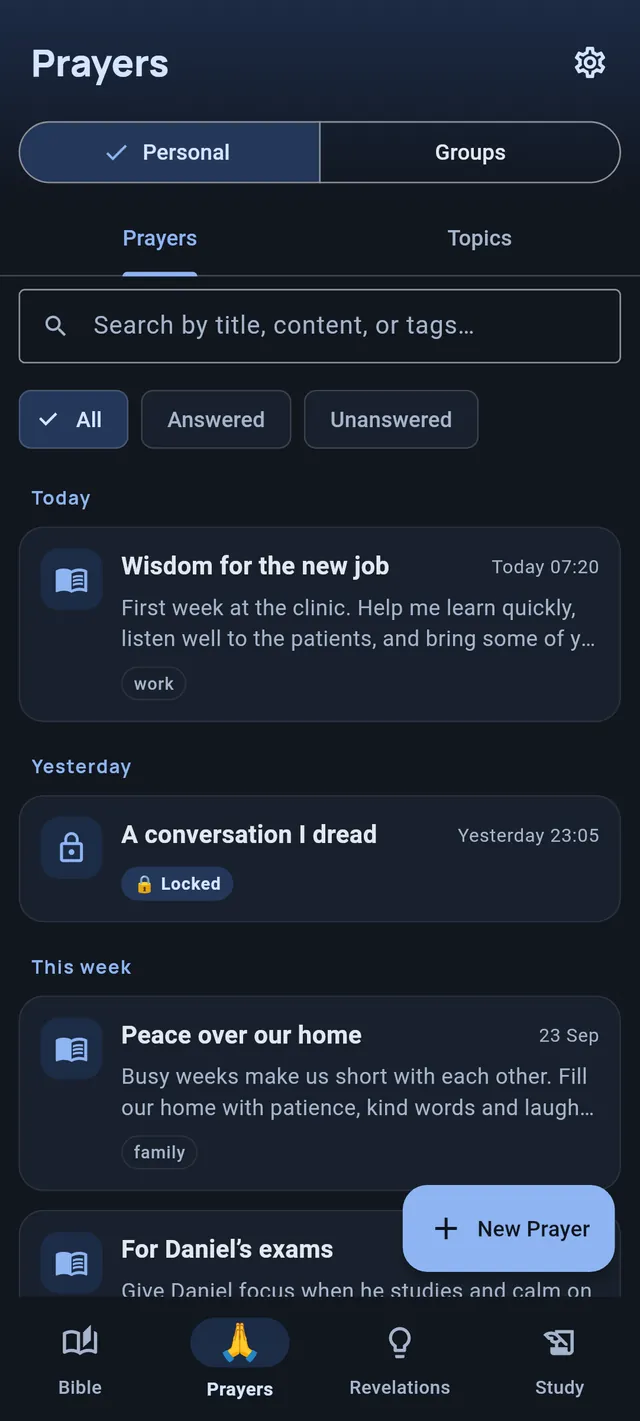
| Prayers | Your prayers and prayer topics under Personal, and your prayer groups under Groups. |
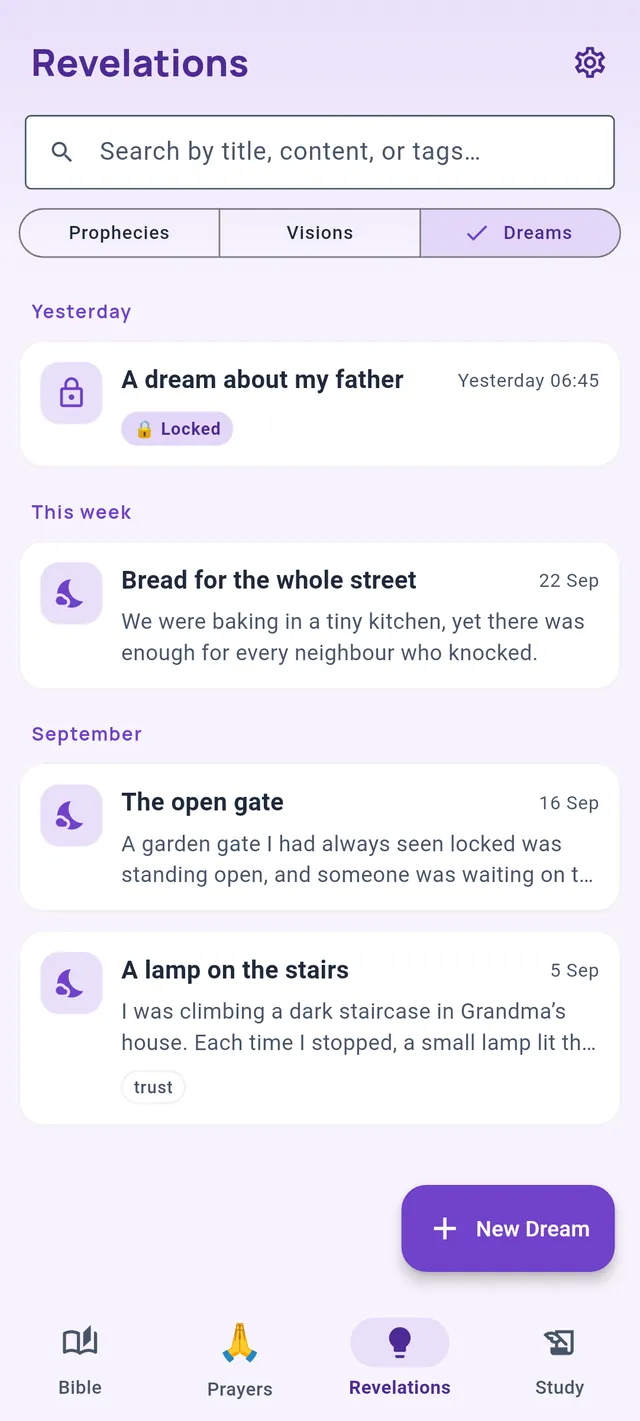
| Revelations | Prophecies, visions and dreams. |
| Study | Bible studies and Notes. The tab reopens on the one you used last. |
Settings is the gear icon at the top right of every tab.
Deleting, and changing your mind
When you delete a prayer, a revelation, a study, a note or a photo, an Undo button stays on screen for five seconds. Tap it and the item comes back exactly as it was.
Reading the Bible
Two complete public-domain translations are built into the app, so you can read without a connection: the World English Bible (WEB) and the Louis Segond 1910 (LSG1910). Either one can be read whatever language the app is in.
Opening a passage
- On the Bible tab, tap Choose a passage to read, then pick a book and a chapter.
- Move through the text with Previous chapter and Next chapter at the bottom, or tap the chapter name at the top to go somewhere else.
- Next time, the Bible tab shows Continue from with the last chapter you read. Tap it to pick up where you stopped.
Translation and text size
Change translation from the version menu on the Bible tab, or from the WEB / LSG1910 badge in the reader’s top bar; the chapter reloads in the other translation. The Aa button makes the text smaller or larger, and the app remembers your choice.
Selecting verses
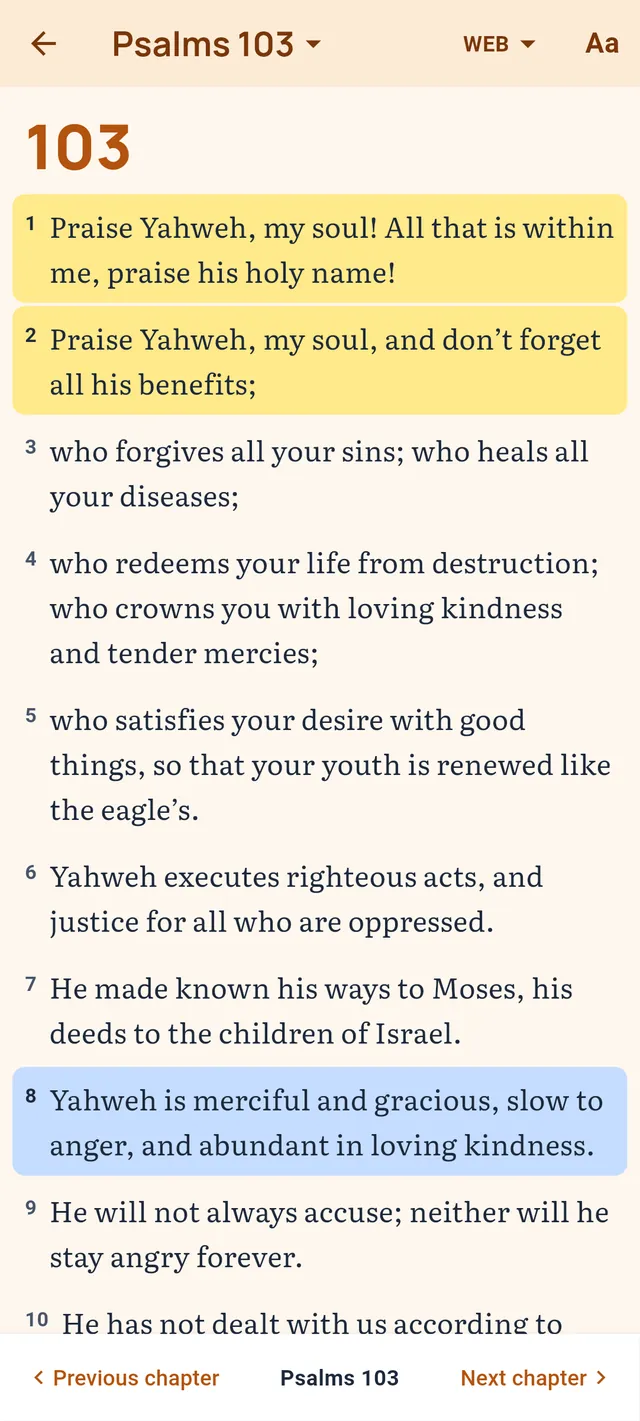
Tap a verse to select it. Tap others to add them, and tap a selected verse again to leave it out. A bar opens with your selection, for example Verses 3–5, and these actions:
| Action | What it does |
|---|---|
| Study this passage | Starts a new Bible study on those verses. |
| Pray about this passage | Opens a new prayer with the passage attached. |
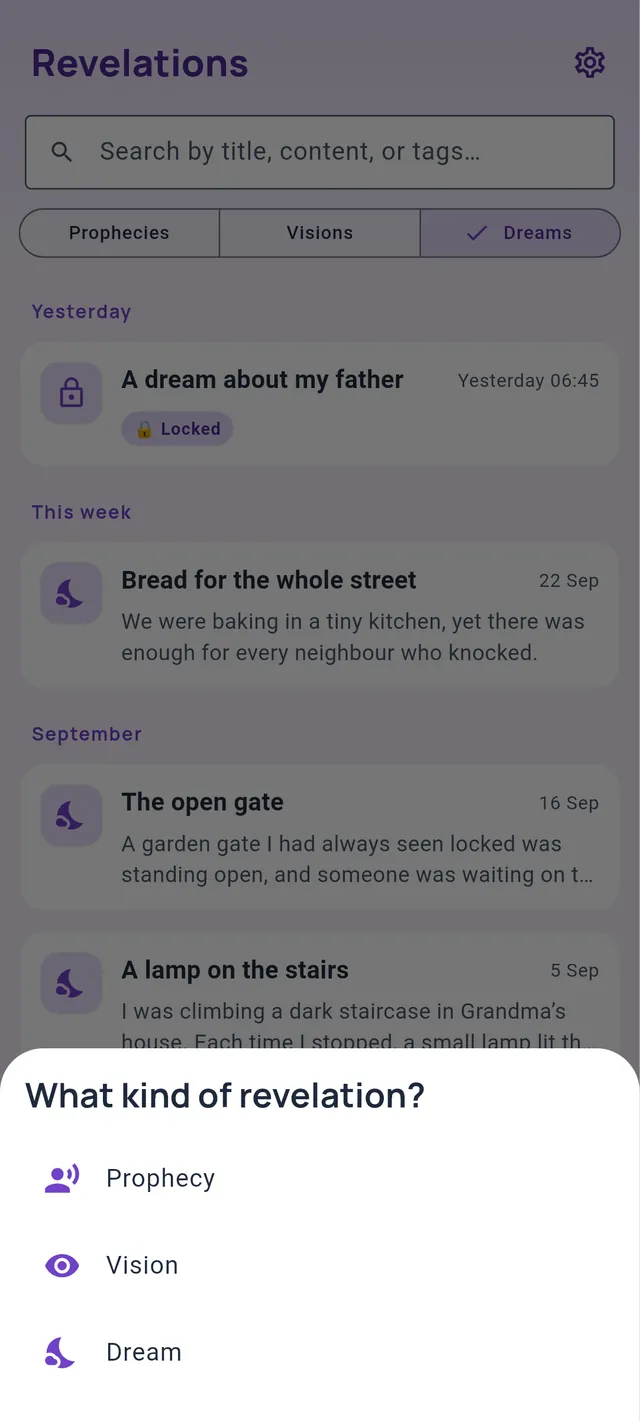
| Revelation about this passage | Asks What kind of revelation? (prophecy, vision or dream), then opens a new one with the passage attached. |
| Note | Opens a new note with the passage attached. |
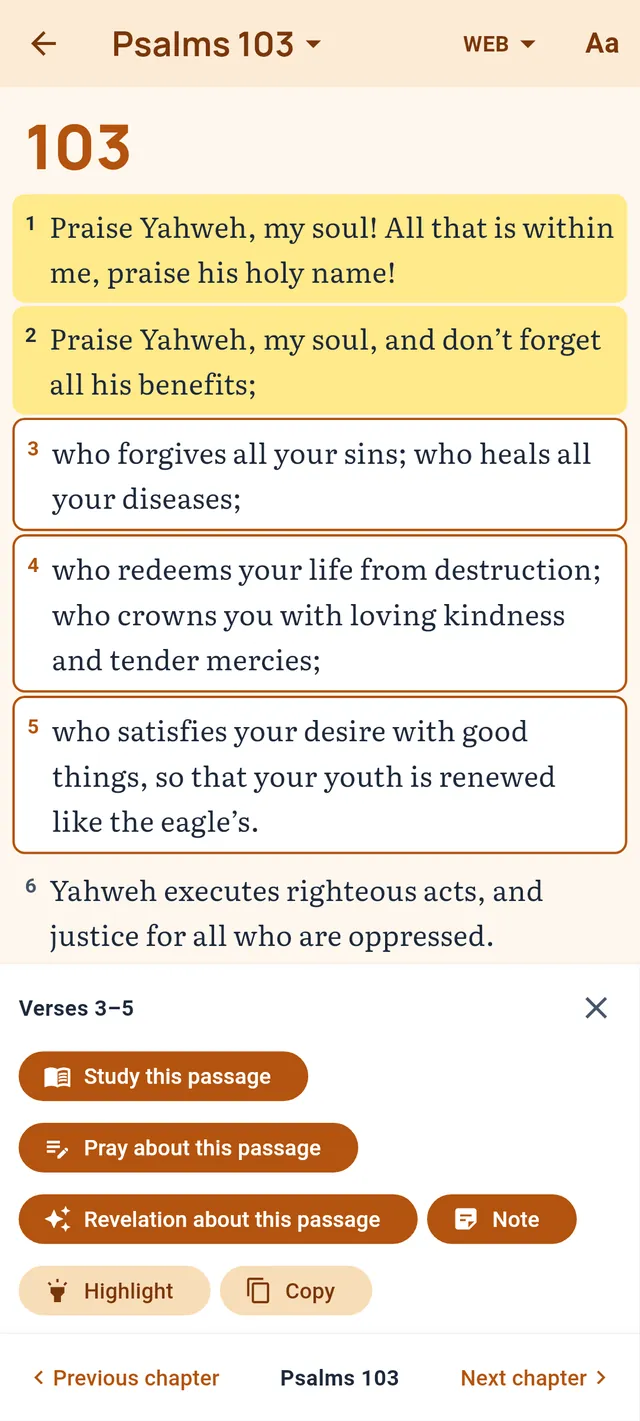
| Highlight | Shows the twelve highlight colours (see Highlights). |
| Copy | Copies the verses and their reference. |
If you pick verses that aren’t next to each other, say 3 and 7, Highlight and Copy act on exactly those verses. The other actions take the whole range from the first to the last, and the bar reads Verses 3–7.
Highlights
Mark verses in one of twelve colours, then find every one of them again in My highlights.
Highlighting verses
- Select one or more verses. They don’t need to be next to each other: you can pick verses 3 and 7 alone.
- Tap Highlight and choose a colour: yellow, orange, red, pink, purple, indigo, blue, sky, teal, green, lime or sand. The colour you used last is ringed.
- To take a highlight off, select those verses, tap Highlight, then Remove. An Undo appears in case you change your mind.
My highlights
Open it from the ⋮ menu on the Bible tab, or with See all next to Recent highlights. It lists every highlighted passage, and you can:
- search with Search verses, books, colours…. Accents don’t matter: “reve” finds “rêve”;
- tap the colour chips to show only some colours;
- sort by Newest or in Bible order;
- use a passage’s ⋮ menu to Change colour or Remove it.
Naming your colours
In My highlights, open the ⋮ menu and choose Name your colours. Give any colour a short name (up to 24 characters), such as “Promises” or “Commands”. The name then appears on the filter chips and in the colour picker.
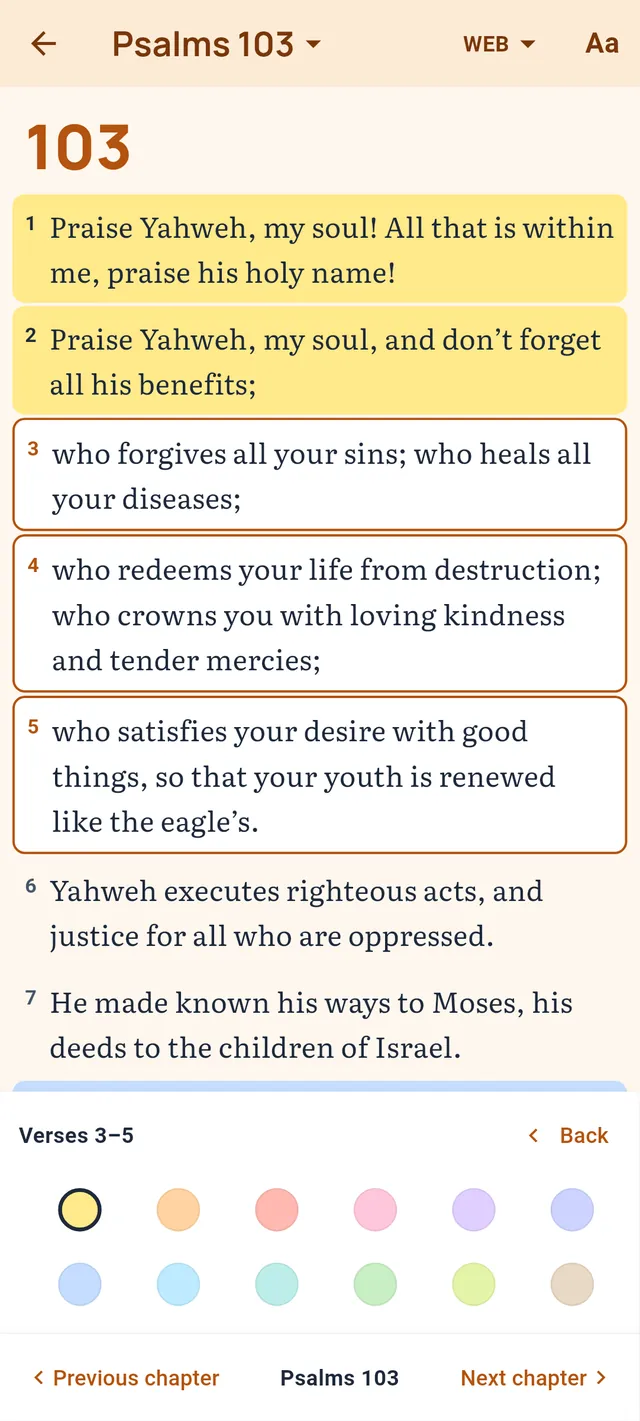
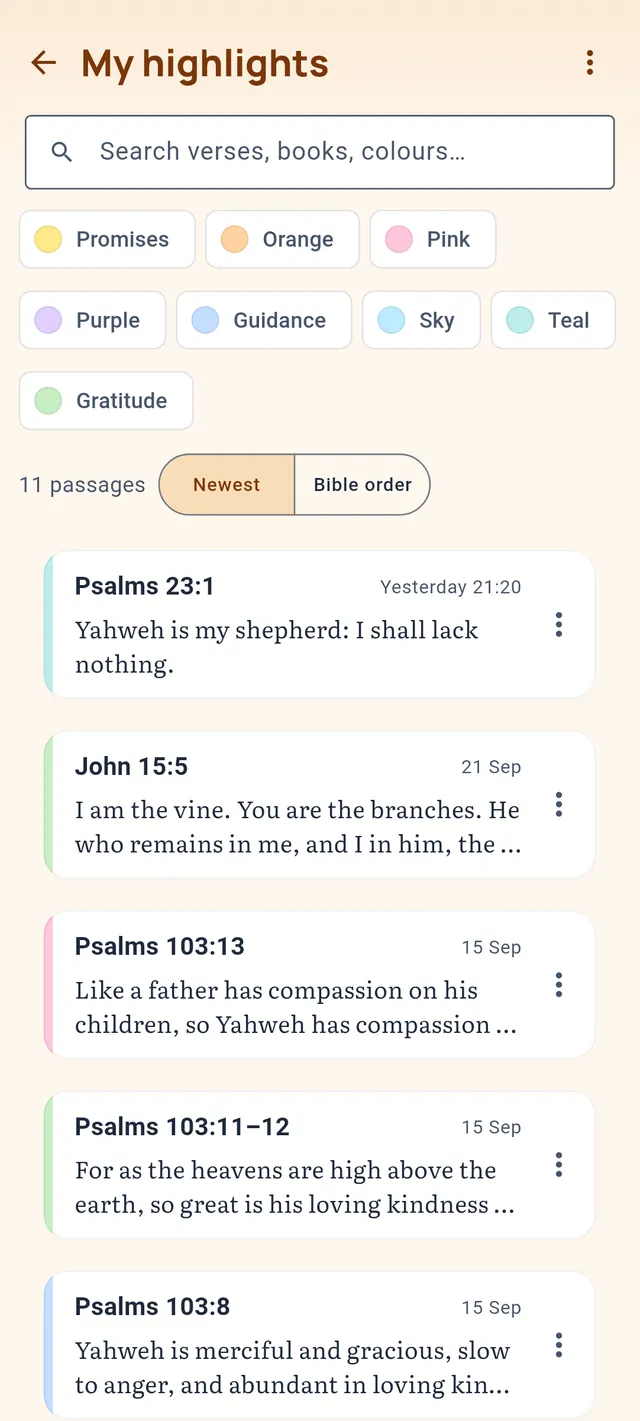
Highlights made with an earlier version are kept. Old amber highlights now show as yellow.
The prayer journal
Write or speak your prayers, follow a request over time, and keep a record of how God answered.
Writing a prayer
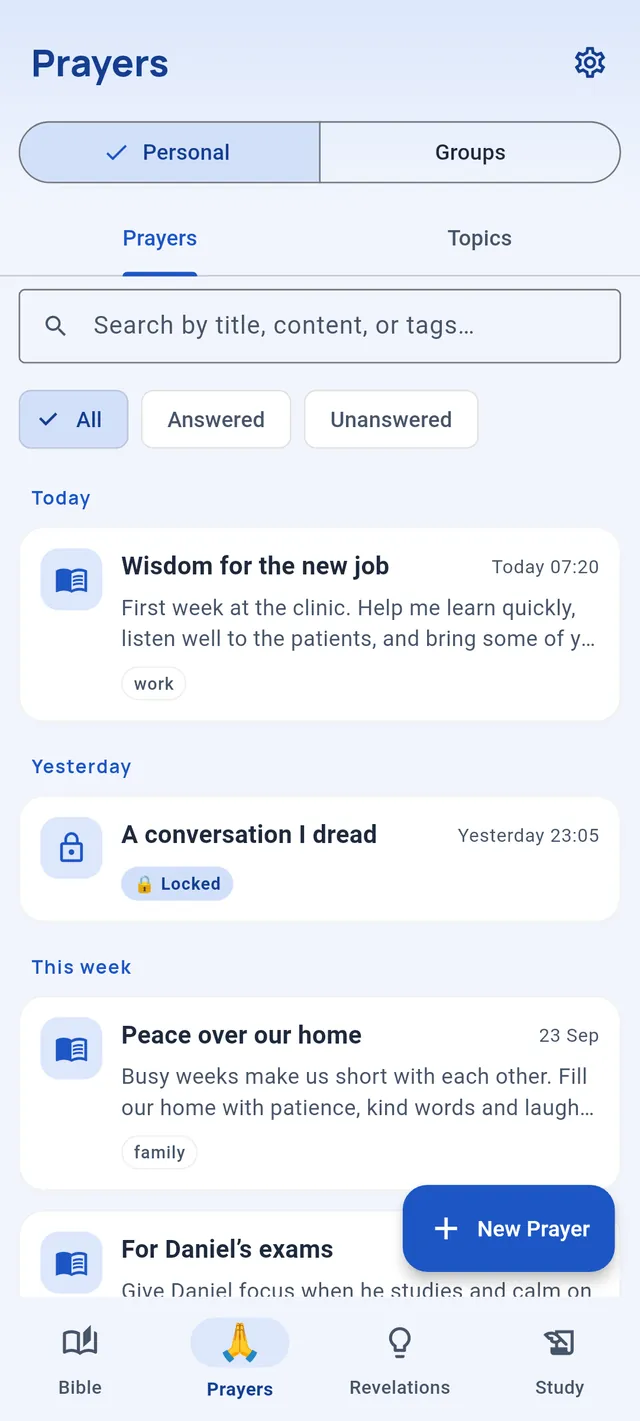
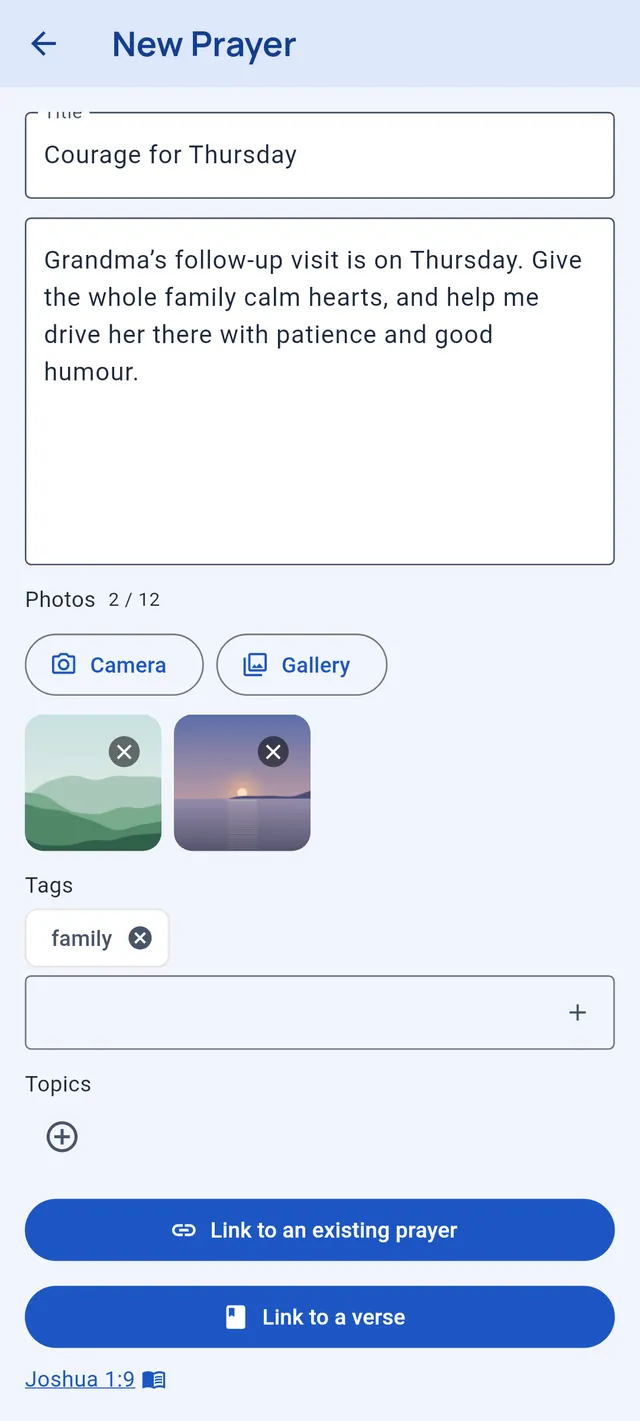
- On the Prayers tab, under Personal → Prayers, tap New Prayer.
- Choose Written Prayer to type it, or Voice Recording to say it.
- Add a title and tags if you like, attach topics, attach a verse with Link to a verse, and add photos with Camera or Gallery.
- Turn on Make private if this prayer should stay locked (see Private entries).
- Tap Save.
Praying out loud
The recorder shows a timer while you speak and stops by itself at 10 minutes. You can listen back and record again before saving. When you play any recording in the app, the speed button switches between 1×, 1.5× and 2×.
When a prayer is answered
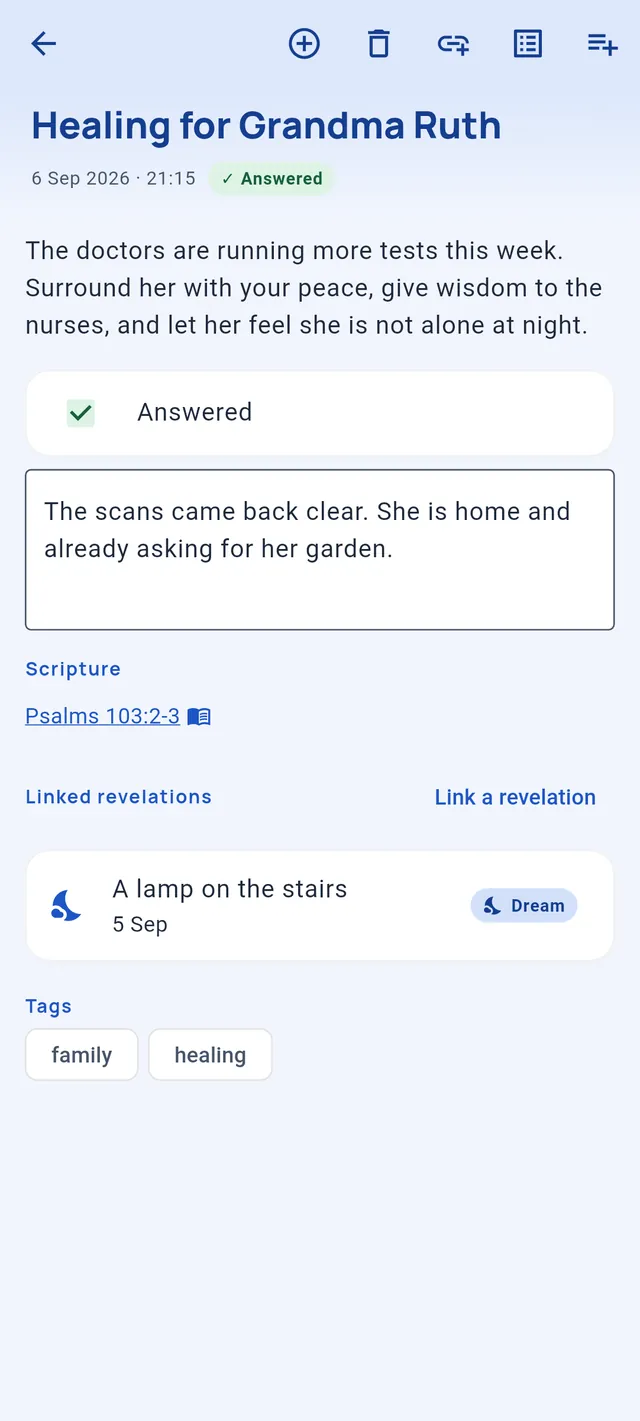
Open the prayer and tick Answered. A field appears, How was this prayer answered?, for what God did. In the list, the All, Answered and Unanswered filters sort them out, and the search box looks through titles, text and tags.
A prayer is a record of what you prayed and when, so its words can’t be changed after saving. You can still mark it answered and write the answer, link it to other prayers, revelations and topics, and delete it.
Following a request over time
Prayers can be chained so that a long request reads as one story:
- Continue Prayer (the ⊕ at the top of a prayer) writes a new prayer linked to this one;
- Link to an existing prayer joins two prayers you already have;
- See Linked Prayers opens the whole thread in order, and at the end of a prayer the app offers Read next chronological prayer?
Links carry through: link C to B, and if B was already linked to A, all three belong to the same thread.
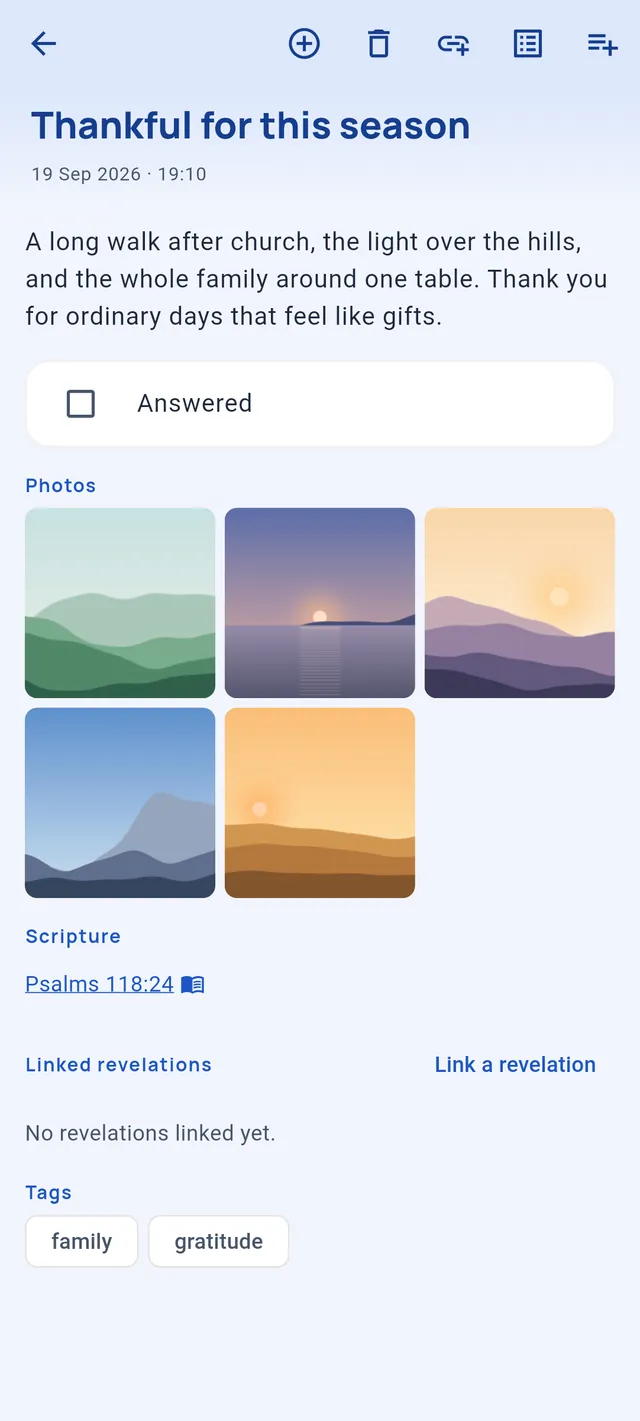
Under Linked revelations, Link a revelation connects the prayer to a prophecy, a vision or a dream. The prayer then appears on that revelation too.
Prayer topics
A topic gathers every prayer about one subject, such as “Healing for Mum” or “Guidance for the move”, so the request and everything you have prayed about it stay together.
- On the Prayers tab, open Topics and tap the add button for a New topic: what to pray for, optional details and tags.
- Link prayers to it from four places: Link an existing prayer on the topic; the Topics row while writing a prayer; Attach prayer topics on a saved prayer; or Pray now on the topic, which opens a new prayer already attached.
- When the answer has come, choose Mark as done. Reopen brings it back.
Search finds topics by title or tag. Deleting a topic keeps its prayers; only the grouping goes.
Revelations
Prophecies, visions and dreams can fade quickly. The Revelations tab keeps them in a journal of their own, written or recorded.
- At the top of the Revelations tab, choose Prophecies, Visions or Dreams. The add button follows: New Prophecy, New Vision or New Dream.
- Choose to write it (for example Written Dream) or Voice Recording.
- Add a title, tags, a verse, photos, and Make private if you want, then save.
From the Bible reader, Revelation about this passage asks What kind of revelation? first, then opens the right one with the passage attached.
Editing and linking
Unlike prayers, revelations can be edited: tap the pencil in the reader. Revelations link to each other the same way prayers do, with the continue button (for example Continue Dream), Link to an existing revelation and See Linked Revelations. The Linked prayers section shows the prayers connected to it.
Bible studies
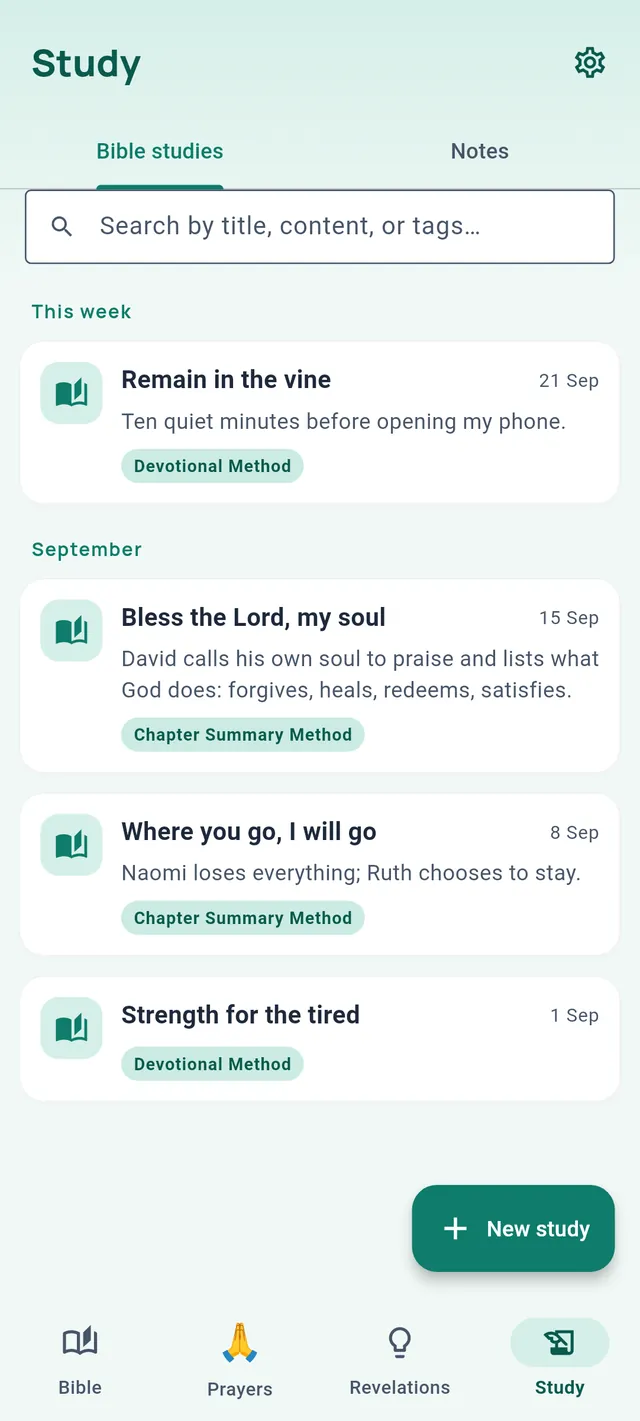
The Study tab has two parts: Bible studies, guided by a proven method, and Notes.
Starting a study
- In Study → Bible studies, tap New study.
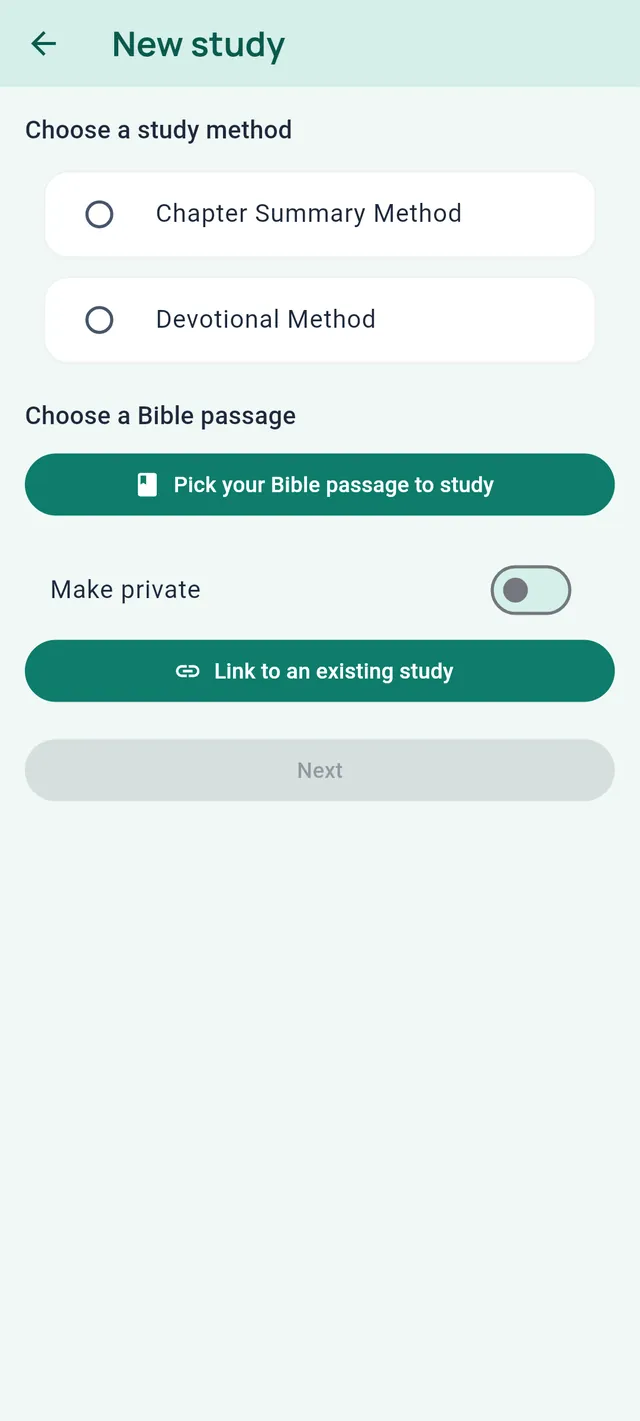
- Under Choose a study method, pick the Chapter Summary Method or the Devotional Method.
- Tap Pick your Bible passage to study: a single verse, a range of verses, whole chapters or an entire book.
- If you like, turn on Make private or Link to an existing study. Then tap Next.
A study takes its name from its passage. Show passage text puts the verses above the fields while you work; Hide passage text tucks them away.
Chapter Summary Method
The app asks you to read the chapter carefully, at least five times, then work through ten headings. First, under Before you begin, a checkbox lets you confirm that you have asked God to help you understand the passage. It is optional.
| Caption | A short title you’ll remember, one to five words. |
| Contents | The chapter’s main points: describe, don’t interpret. |
| Chief People | The important people, and why they matter here. |
| Choice Verse | The verse that best captures the chapter. Its text is shown for you. |
| Crucial Words | Key or repeated words that carry the meaning. |
| Challenges | What is hard to understand, or worth studying later. |
| Cross-References | Other passages that shed light on this one. Add as many as you like. |
| Christ Seen | What the chapter shows about Jesus. |
| Central Lesson(s) | The main principles God is teaching here. |
| Conclusion | One concrete way you will apply it: personal, practical, possible, provable. |
The Choice Verse and every cross-reference are links: one tap opens the Bible at that passage.
Devotional Method
- Pray for insight. Confirm that you have asked God to help you understand the passage. This step is required.
- Read the passage slowly, more than once.
- Meditate on it in six ways: picture it, pronounce it, paraphrase it, personalize it, pray it, and probe it with nine questions. Is there a sin to confess, a promise to claim, an attitude to change, a command to obey, an example to follow, a prayer to pray, an error to avoid, a truth to believe, something to thank God for?
- Apply it. One concrete action, specific enough that you’ll know when it’s done.
- Verse to memorize. Pick a verse; its text is shown so you can learn it.
From a study’s reader you can edit it, delete it, link it to another study and read the series in order.
Notes
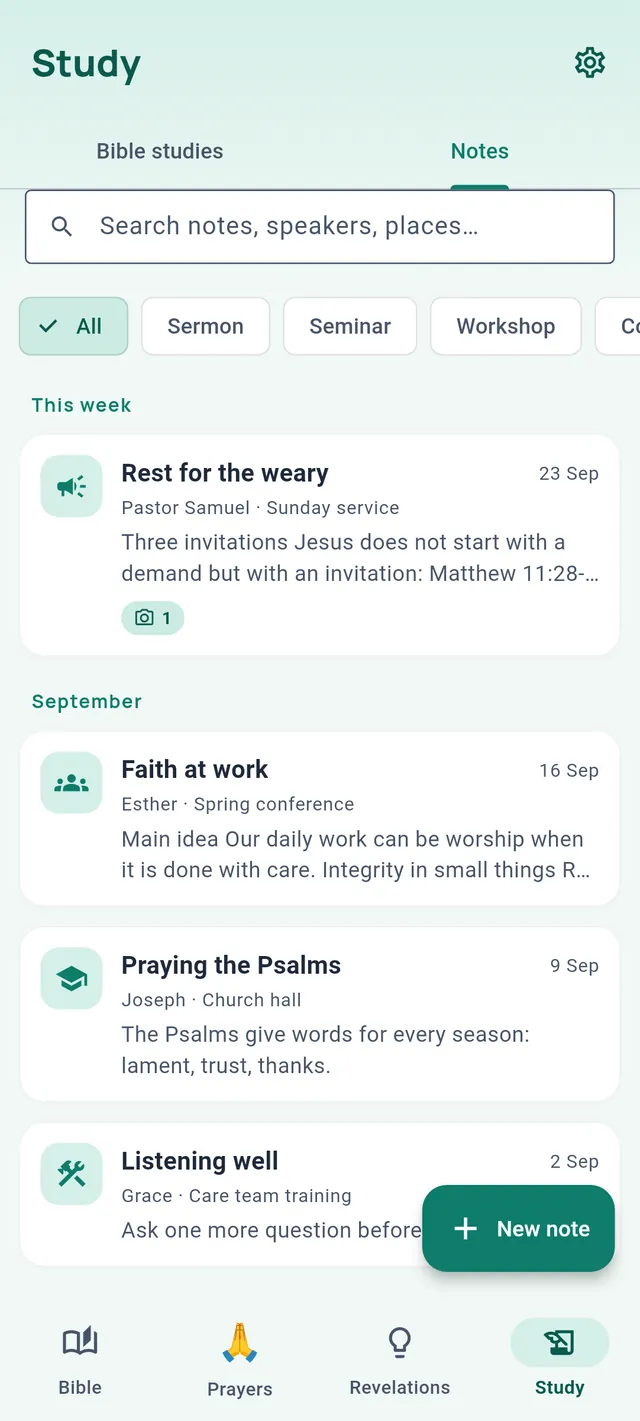
Notes are for what you hear and read: a sermon, a seminar, a workshop, a conference, or anything else worth keeping.
Taking a note
- In Study → Notes, tap New note.
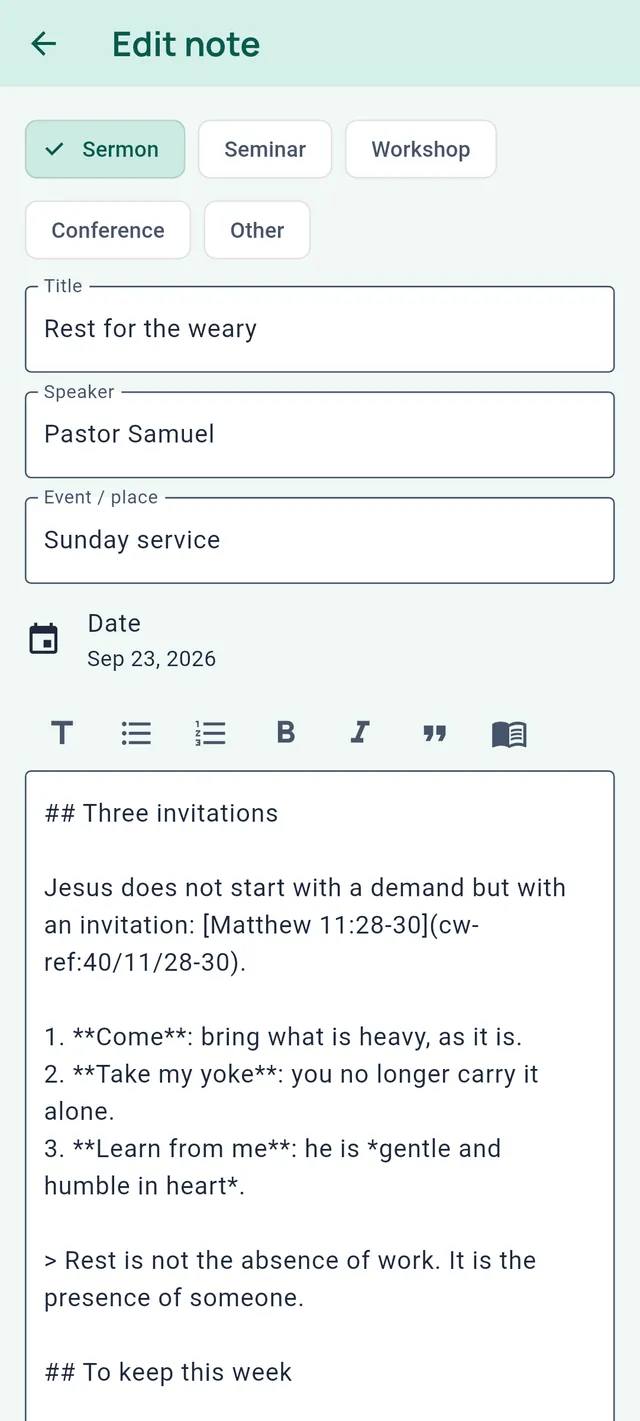
- Pick what it is: Sermon, Seminar, Workshop, Conference or Other. Add a title, the Speaker, the Event / place and the Date.
- Write. The note saves as you type, and Saved appears at the top. There is no Save button to forget.
- Add tags, photos, or Make private further down.
The toolbar above the text adds a Heading, a Bulleted list or Numbered list, Bold, Italic and a Quote. Insert verse adds a Bible reference to the text. Press Enter at the end of a list item to continue the list, or on an empty item to end it.
A new note that you leave empty is not kept.
Starting from the Bible
In the reader, select verses and tap Note: a new note opens with the passage already attached.
Reading, linking and finding notes
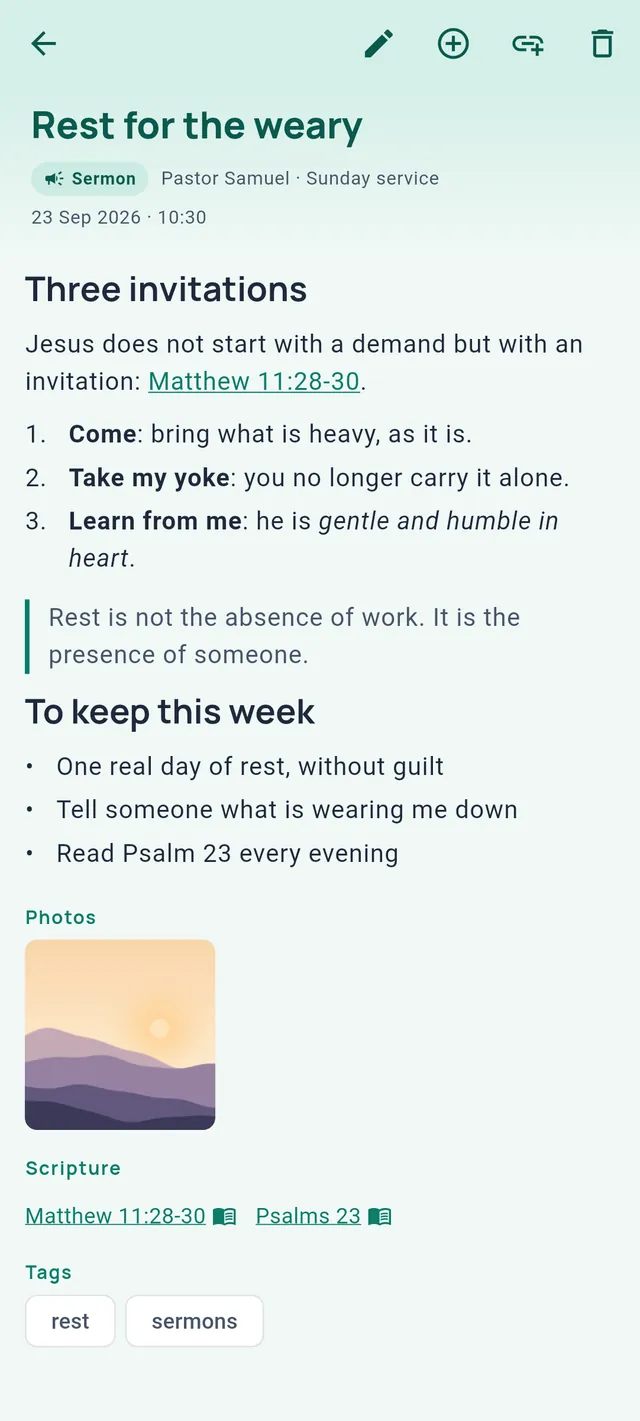
The reader shows your formatting. Tap a verse reference to open the Bible at that passage. At the top of a note you’ll find Edit, Continue note, Link to an existing note and Delete. Once a note has linked notes, See Linked Notes shows the series in order.
In the list, search with Search notes, speakers, places… and filter by kind with the chips. Search matches the beginning of words: “lead” finds “leadership”. For private notes, only the title is searched.
Photos
A prayer, a revelation or a note can carry up to 12 photos.
Adding photos
In the editor, the Photos section shows how many you have (for example 2 / 12). Tap Camera to take one or Gallery to choose from your phone. If you pick more than there is room for, the first ones are kept and the app tells you. Tap × on a thumbnail to remove it.
You add a prayer’s photos while writing it. For revelations and notes, you can also add more later by editing them.
Before storing a photo, the app resizes it and removes its location, camera and date details. It does not keep a full-size copy.
Looking at them
Photos appear under the entry: the first six, then a “+N” tile for the rest. Tap one to open it full screen: swipe between photos, double-tap to zoom, and use the ⋮ menu to Edit caption, Share or Delete, with Undo.

Photos and captions of private entries are stored encrypted. While the vault is locked, the entry shows no photos and its card shows no photo count.
Private entries and the vault
Any prayer, revelation, study or note can be made private. Its content is encrypted on your phone (AES-GCM) and opens only after you unlock.
What is locked
The text, voice recording, photos and captions of a private entry are encrypted. Its title, tags, dates and attached Bible references are not, so your lists, dates and search still work. The note you write when a private prayer is answered is not encrypted either. While the vault is locked, a private entry appears as a card marked Locked.
Setting it up
The first time you turn on Make private, the app sets up the vault:
- Create an app PIN of at least four digits and enter it twice. If your phone supports it, you can also unlock with your fingerprint or device PIN.
- Pick a security question and enter your answer twice. It is the only way back in if you forget your PIN.
- Confirm that you understand this, and tap Confirm setup.
Unlocking and locking
Opening a private entry shows Unlock private entries. Enter your PIN, or tap Use fingerprint / device PIN, which appears whenever your phone supports it. Forgot PIN? asks your security question and lets you choose a new PIN.
The vault locks again two seconds after you leave the app. You can also lock it at any time in Settings → Private vault → Lock now. To choose a new PIN, use Forgot PIN? on the unlock sheet.
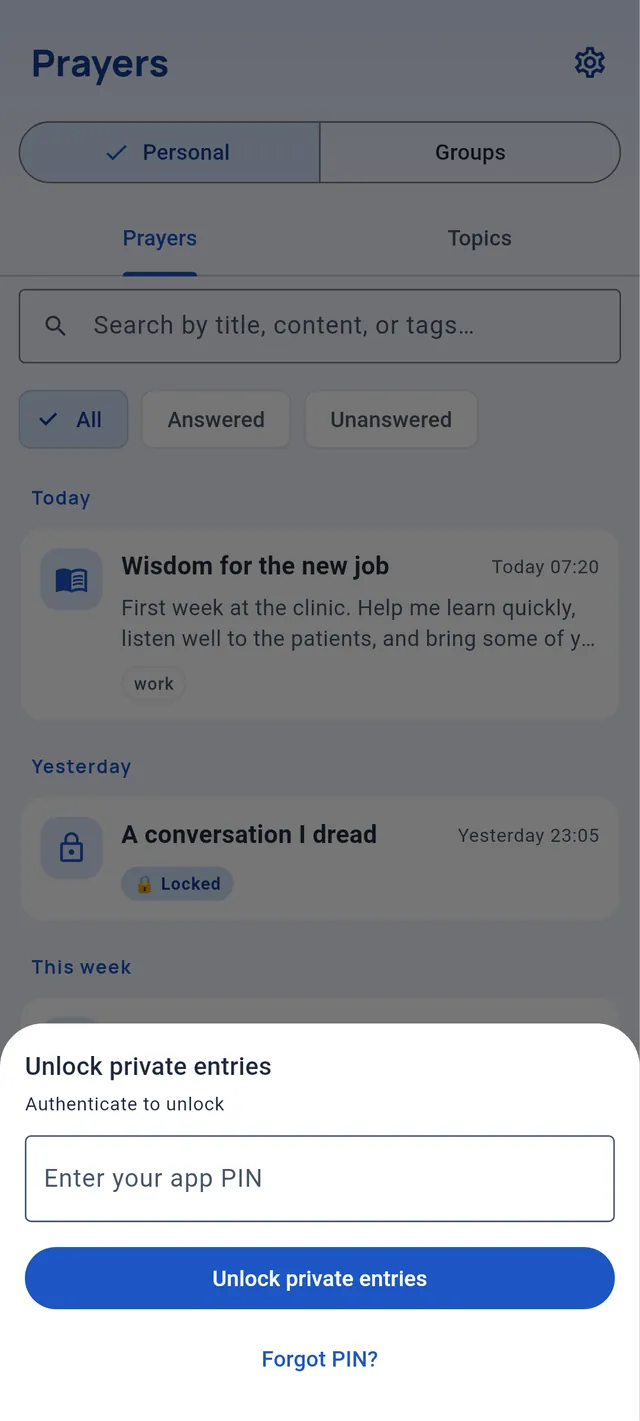
If both your PIN and your security answer are lost, private entries cannot be recovered by anyone, including the developer.
Prayer groups
Pray together with your family, your small group or your church. Groups live under Groups at the top of the Prayers tab, and everything shared in them is encrypted end to end.
Creating a group
- Prayers → Groups → the add button → New group.
- Give the group a name and set Your name in this group. It is filled in from Settings.
- Save. The app creates the group’s encryption key and shows the invite.
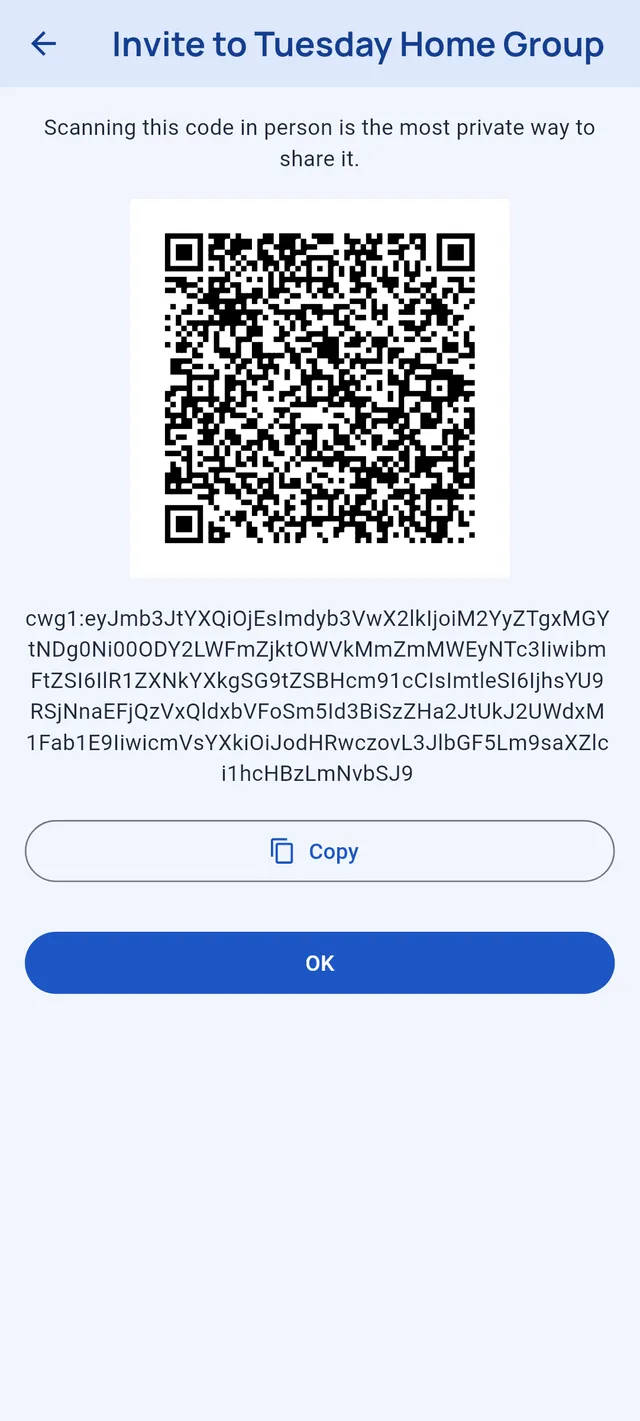
Anyone who has the invite can read everything shared in the group. Share it carefully; showing the QR code in person is the most private way.
Inviting and joining
The invite screen shows a QR code and the same invite as text, with Copy. To show it again later, open the group’s ⋮ menu → Invite. To join, go to Groups → the add button → Join a group, then Scan invite or Paste invite code, enter your name, and join.
The app confirms with You’re in!, and what was shared before arrives with the next sync or update file.
Members and leaving
A group’s ⋮ menu has Members, Rename me and Leave group. There is no way to remove someone: everyone holds the key, so to exclude a person for good, start a new group with a new invite.
Inside a group
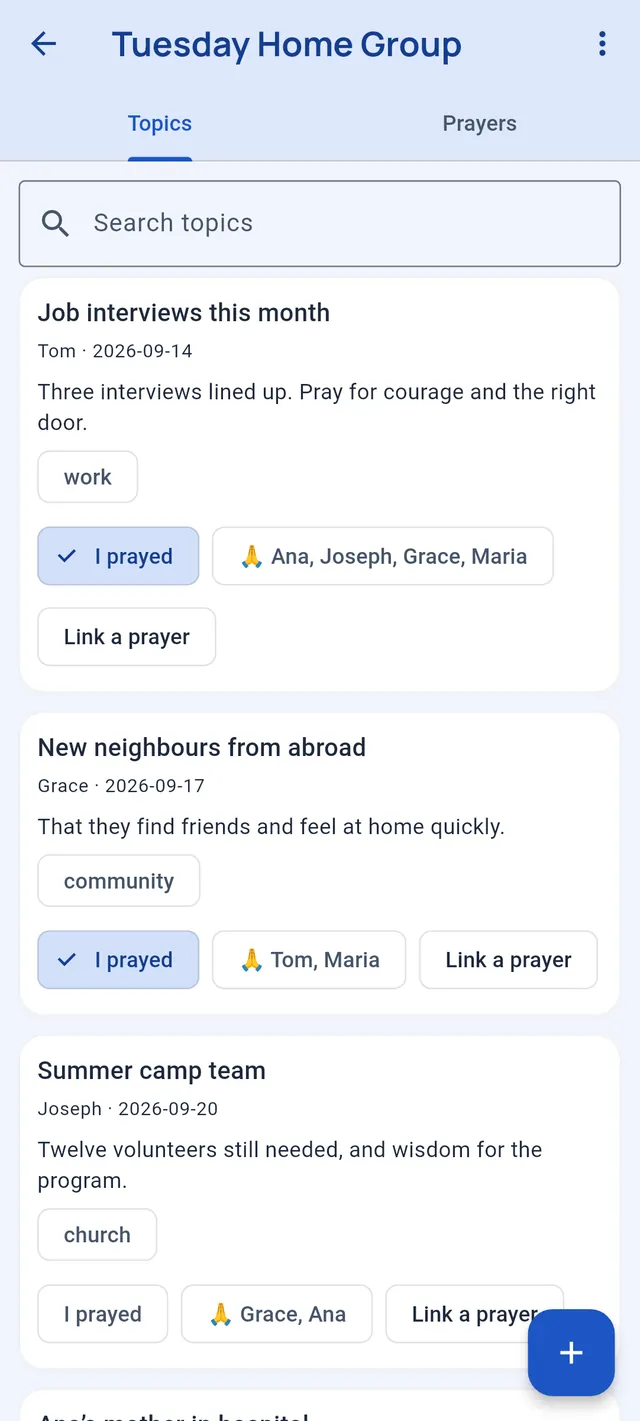
A group has two tabs, Topics and Prayers. The add button adds an item to the tab you are on.
- New group prayer writes a prayer straight into the group, with a title, tags, Bible references and links to the group’s topics.
- Share to group… sends a copy of one of your own prayers. For a private prayer, the app warns that it shares a decrypted copy; for a voice prayer, that it shares the recording.
- I prayed on a topic lets everyone see who has prayed.
- Mark your own shared prayer Answered with an optional note. Others see the answer but can’t change it.
- Link a prayer connects prayers and topics.
- Voice prayers shared in a group play without unlocking your vault, because they are encrypted with the group’s key.
- Retract removes something you shared, for everyone. Hide tucks away someone else’s item on your phone only.
Keeping a group in sync
There are two ways to keep a group up to date. Each group can use either, both, or neither.
Automatically, through a relay
New groups sync automatically through a relay, with nothing to set up. To check or change it, open the group’s ⋮ menu → Relay settings:
- Relay URL: where updates are exchanged. Use default relay resets it; you can also enter the address of another relay.
- Auto-sync via relay turns it on or off.
- Sync now syncs straight away, and the last sync time is shown below.
With auto-sync on, a group syncs when you open the app or pull to refresh in the group, when you tap Sync now, about 30 seconds after your last change, and in the background roughly every six hours.
Everything is encrypted on your phone before it leaves. The relay only stores unreadable data in an anonymous mailbox: never your prayers, the group’s name or who is in it. Its operator can see connection details such as IP addresses and times.
By hand, with an update file
Share updates in the group’s ⋮ menu packs the group’s changes into an encrypted .cwg file and opens your phone’s share sheet: send it by message, email, anything. The person who receives it opens the file, or uses Import update, and it is merged in. An Unsent changes badge reminds you when you have changes you haven’t shared yet.
You can mix both ways freely. Every sync carries the group’s whole history, so everyone ends up with the same content.
Google Drive backup
Backup is optional and off until you turn it on. It keeps a copy of your journal in your own Google Drive, so you can bring it back on a new phone.
Turning it on
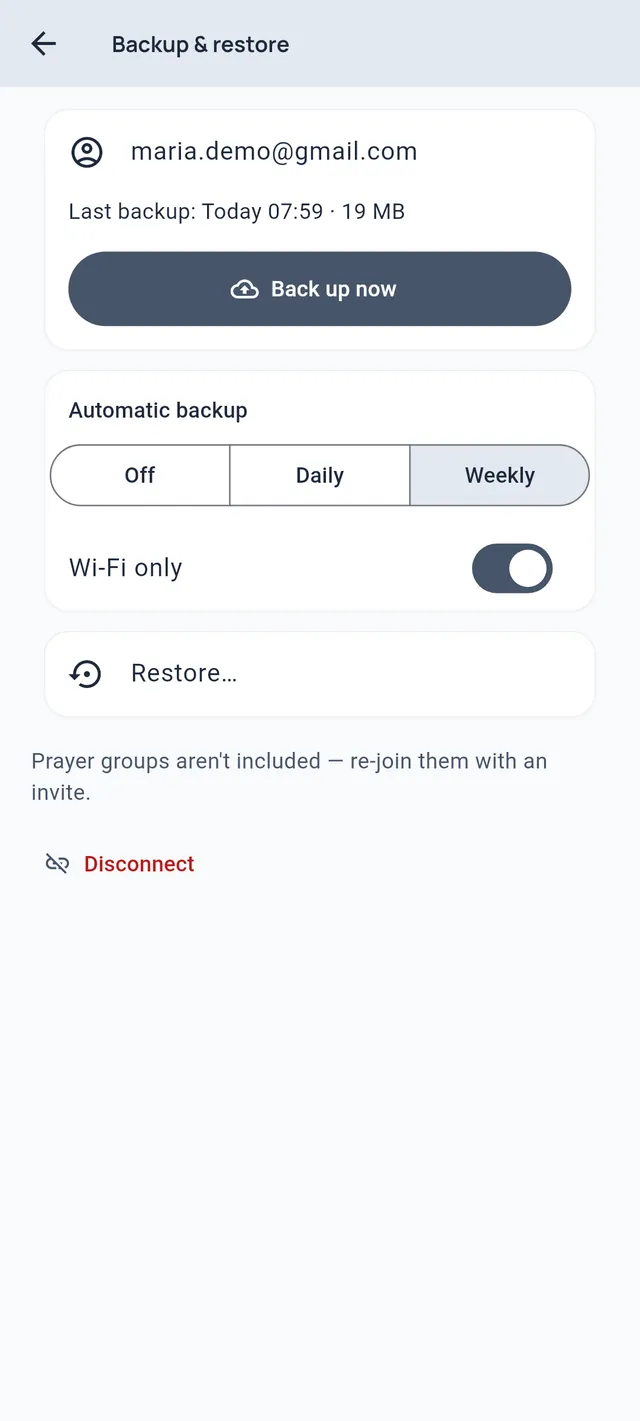
- Settings → Backup & restore → Connect Google Drive.
- Choose your Google account and allow access. The app asks only for its own hidden folder in your Drive; it cannot see your other files.
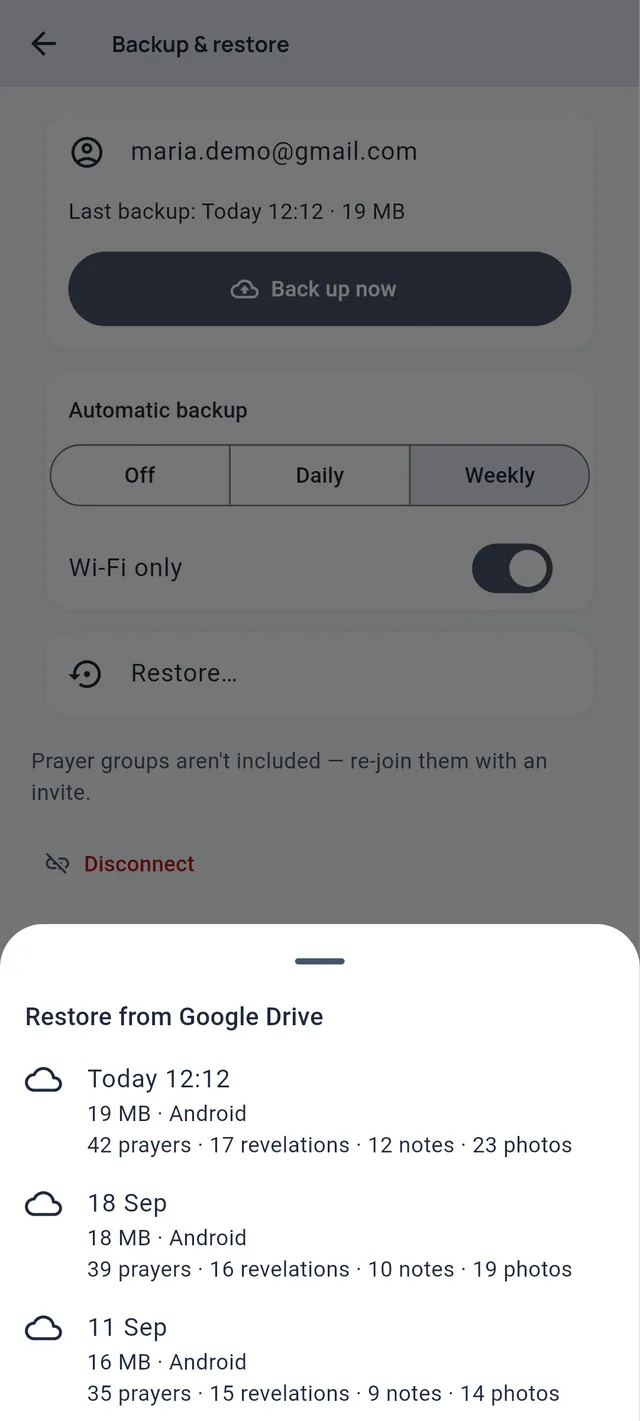
- Tap Back up now, or choose Automatic backup: Off, Daily or Weekly. Wi-Fi only is on by default.
Scheduled backups run in the background and catch up when you open the app. The last five backups are kept, and a backup of an empty journal never replaces an older one. If something goes wrong, the Backup page says so and a dot appears on the Settings gear.
What is included
Your prayers, revelations, studies, notes, topics and highlights, their recordings and photos, and your settings. Private entries stay encrypted inside the backup. Prayer groups and their keys are never backed up: after a restore, join them again with an invite.
Restoring
Tap Restore… to see your backups, with their date, size, platform and what they contain. Choosing one replaces everything on this phone, after you confirm. If the restore fails, your data is left as it was. On a new phone, Restore from Google Drive is offered on the very first screen.
After a restore, unlock your private entries once with your old PIN or your security answer. A backup made by a newer version asks you to update the app first.
Disconnecting and deleting backups
Disconnect stops backups. Backups already in your Drive stay there, even if you uninstall the app. To delete them, open Google Drive → Settings → Manage apps → Christian Walk → Options → Delete hidden app data.
Settings
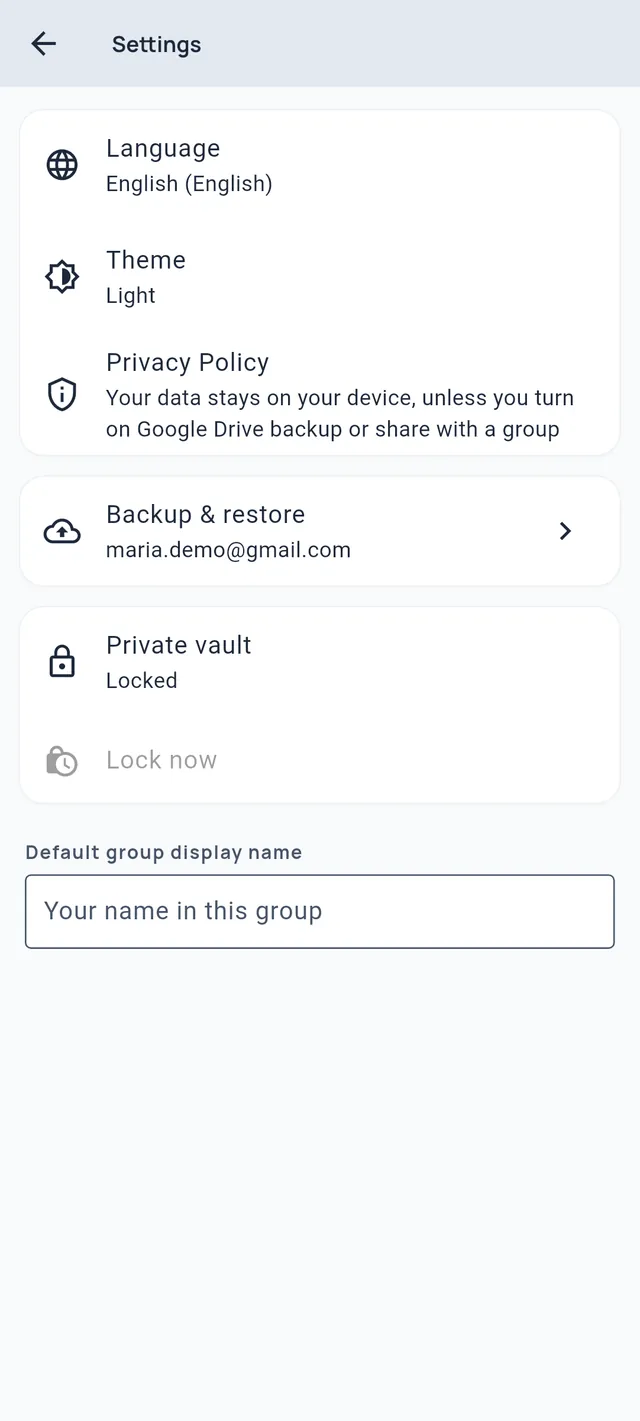
Tap the gear at the top right of any tab.
| Language | Follow system, English or French. |
| Theme | Follow system, Light or Dark. |
| Privacy Policy | The full policy, inside the app. |
| Backup & restore | Google Drive backup (see Backup). |
| Private vault | Shows whether it is locked, with Lock now. |
| Default group display name | The name filled in when you create or join a group. |
The Bible translation is chosen on the Bible tab, and relay settings belong to each group.
Permissions
The app asks for as little as it can, and only when a feature needs it. You can refuse any of these and keep using everything else.
| Permission | Used for | Asked when |
|---|---|---|
| Microphone | Voice prayers and revelations | The first time you record. |
| Camera | Taking photos, scanning a group invite | The first time you use the camera. If you refused, the app offers Open settings. |
| Photos | Adding photos from your gallery | Never: Android’s photo picker only shares the photos you choose. |
| Biometrics | Unlocking private entries | When you unlock with your fingerprint or face. |
| Internet | Google Drive backup and group sync | No prompt. Used only if you turn those on. |
The app never asks for your location, your contacts or permission to send notifications. For the full picture, read the privacy policy.